Hey Siri, I'm Arriving Home
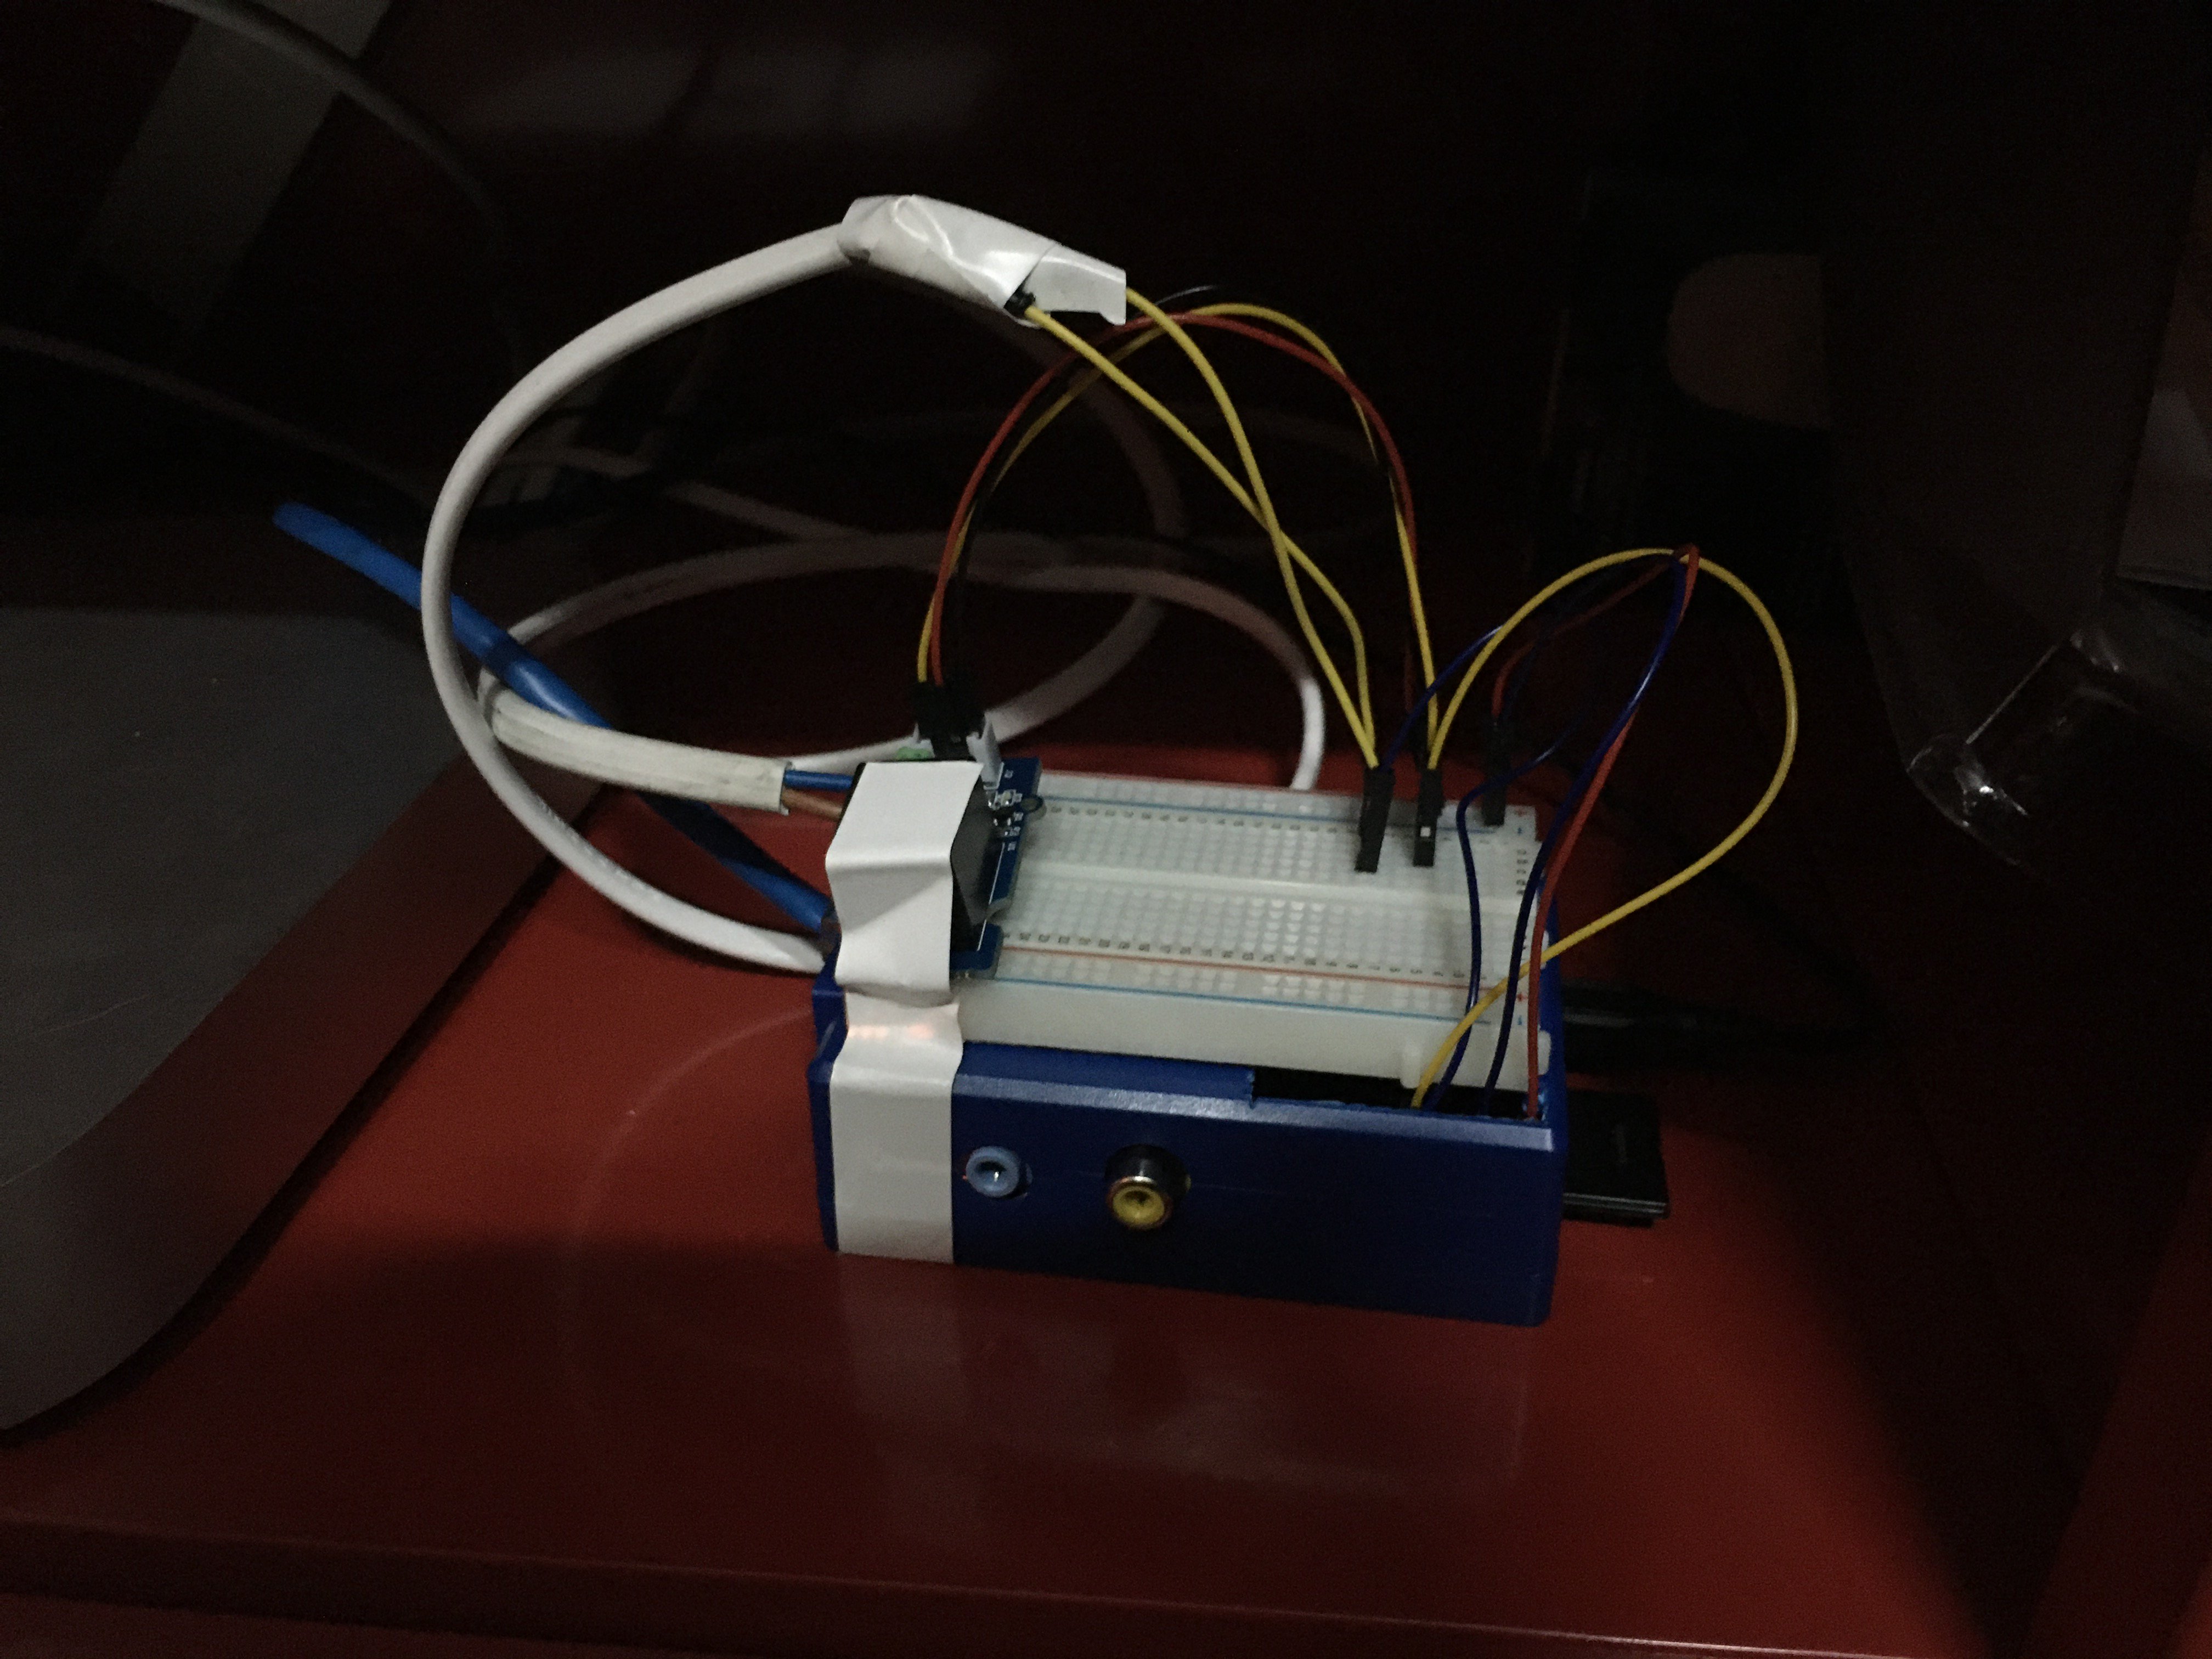
Last year, I used an old Raspberry Pi and some simple circuitry to add my garage door to HomeKit. And for the past year that's been working surprisingly well for something that looks like this:

Raspberry Pi and related circuitry to control the garage door.
I was using it daily and I believe it only failed 3 or 4 times. After some investigation I figured out that for some reason my relay would sometimes stop responding. Everything else was working just fine: the Pi, Homebridge, the tension to the relay1, etc. The relay just didn't respond.
So I needed to replace that relay, but while I was at it I might as well improve on the solution.
The Goals
Besides controlling my garage door, there's a couple of other things I'd like to automate in my garage:
- The lights. By automating the lights I can have them turn on and off automatically when the garage opens or closes.
- The building's garage door. I live in an apartment building, and my personal garage is just one of many on the underground floors. So I still need to go through the building's garage door for which I carry a remote around.
To automate the lights I ordered: another relay, a replacement button with 3-way switching and a light sensor.
I believe any automations I add should be transparent. That is, all the buttons in the house should keep working like they always did2. To that extent my idea was to simulate the stairs switches many of us are familiar with, where both the buttons on top and bottom of the stairs can always negate the current state of the lights. That's why I needed a replacement button with multiway switching. The new relay was going to play the role of the other button. Finally the light sensor was going to let me know if the light was on or off. There are no windows in my garage so no chances of false positives.
Automating the building's garage door was going to be a bit trickier. For one, I can't just start connecting my relays there without the building's consent3, and also the door is on the other side of the building. My solution was going to just be simulating the button on my garage's remote. So I ordered a 433 Mhz transceiver for the Pi. I'd use the receiver to read the code from the remote and the transmitter to then replay it.
Introducing Shelly
I ordered all this stuff around the same time we started hearing about COVID in China. A month later and I'm stuck at home and the last thing I have on my mind is working on small circuits while two kids run around wreaking havoc.
The good news is that, while this was all sitting in a drawer, I got introduced to Shelly by some fellow developers. This company makes small IoT devices that are relatively cheap, work via WiFi and don't require an account on some remote service to control them.
I was definitely intrigued, specially because I've been wanting to automate the blinds around my house and my solutions so far would cost around 50€ for each blind and still require some other gateway device.
So when I found out there was already a HomeBridge plugin and that I could buy this thing for 20€ on my local electronics store… the decision was made!
Fast-forward a few days and I had a Shelly 2.5 installed behind the buttons for my kitchen's blinds, integrated with HomeKit via HomeBridge and working flawlessly! The physical buttons worked, HomeKit worked, including the ability to set the blinds to random positions (not just open or closed) and, of course, Siri as well.
Replacing the Raspberry Pi
Excited about these devices I started looking at what else I could do. Quickly I discovered I could replace the Raspberry Pi I had in my garage with a couple of Shelly 1's. One to control the garage door, and the other to control the lights.
Installation was almost as easy as the kitchen's blinds apart from the fact that the WiFi connection with the powerline device I had in my garage was riddled with packet loss. I spent a bunch of time tweaking the WiFi settings but always with the same result. And both Shellys were exhibiting the same issue, so it was unlikely a hardware fault.
So I tried creating a WiFi network with the Mac Mini I already had in the garage and voilá. Everything fell in to place. I added the automation to turn on/off the lights when the garage open/closes and could cross off goal #1 from the list.
By now the Raspberry Pi was only running HomeBridge, so I moved that to the Mini and brought the Pi upstairs to start working on the 433 RF transceiver for goal #2.
Sniffing RF codes
To recap, the goal here was to sniff the code from my remote so I could then expose a simple on/off switch to HomeKit that would replay the code. The transmitter would be placed inside my garage.
There are a bunch of guides on the web, such as this one, on how to sniff and replay RF codes. And there are already a few different tools available that can automate most of the process.
The first issue I found was that I could only "hear" my remote's signal if I placed it very close to the receiver (like 2 centimeters close!)… which didn't make me very hopeful about the transmitter's range. I investigated this a bit more and this seemed to be a common issue with these transceiver's. The solution seemed to be soldering some antennas which would typically increase the range to a few meters at least.
Range issues aside, I pushed forward and plotted the signal I recorded. I found out my remote uses 27 bits, jotted down the sequence of 0's and 1's and eyeballed the pulse interval. I then used another tool to emit the code via my transmitter and read it back using the receiver, plotting the result and comparing it to the original plot from my remote. I did this a few times tweaking the parameters until I finally deemed it "close enough".
Downstairs in my garage I tested with the transmitter about 3 meters away from the building's garage door motor but nothing… I wasn't sure if this was simply a range issue or a problem with my code.
Sonoff RF
At this point I'm already like a week into working on this circuit… reading about 433 mhz codes, different tools to read and transmit them, how to make your own antennas, etc. When I stumble on the Sonoff RF Bridge.
Sonoff is brand of IoT devices not that different from Shelly mentioned above. But they also make an RF bridge with can transmit 433 mhz RF codes on command (via IP) or listen to RF signals to trigger actions. It could also read the code from an existing remote and replicate it! This sounded too good to be true… Once again, my local electronics store had a couple of these in stock, so I picked one up the very next day.
I get the device up and running, connect it to my WiFi and use their app to give it a test. It apparently is able to ready the code from my remote just fine, and it also looks like it's replaying it on command (a led flashes), but my garage door doesn't budge…
Once again I turn to Google… and inside one of the dozen tabs I have open there's a comment from someone mentioning the stock firmware from Sonoff only works with 21 bit RF codes… By now I already know my remote uses 27 bits. So that explains the issue, but can we do?
Tasmota
Inevitably, if you're searching the web about Shelly or Sonoff devices (which use the ESP8266 chip) you'll discover the Tasmota open source firmware.
This is a custom firmware that aims to add more configuration and flexibility to these devices. And they do support the Sonoff RF Bridge. Not only that, but it can also work with another custom firmware for Sonoff's RF chip that does away with the 21 bit limitation and can basically replay whatever you tell it to.
At this point, I have to choose between going back to my breadboard and soldering some antennas or flashing this device with a couple of new firmwares. Being a software guy I chose the latter (I don't even owen a soldering iron). This means one more trip to the electronics store to get an USB to serial adapter to flash the device.
It's aliv^H^H^H^H opening!
After flashing both chips, I get everything up and running and start trying to replay my remote's code. It takes a bit of fumbling with different commands while trying to compile bits and pieces of information on the web on how to operate the RF chip but at last… I'm able to get the door open 🎉!
Finally, I just need to setup MQTT (Tasmota uses MQTT to communicate) on the Mac Mini and add another HomeBridge plugin to interface with this MQTT server.
Bringing it HomeKit
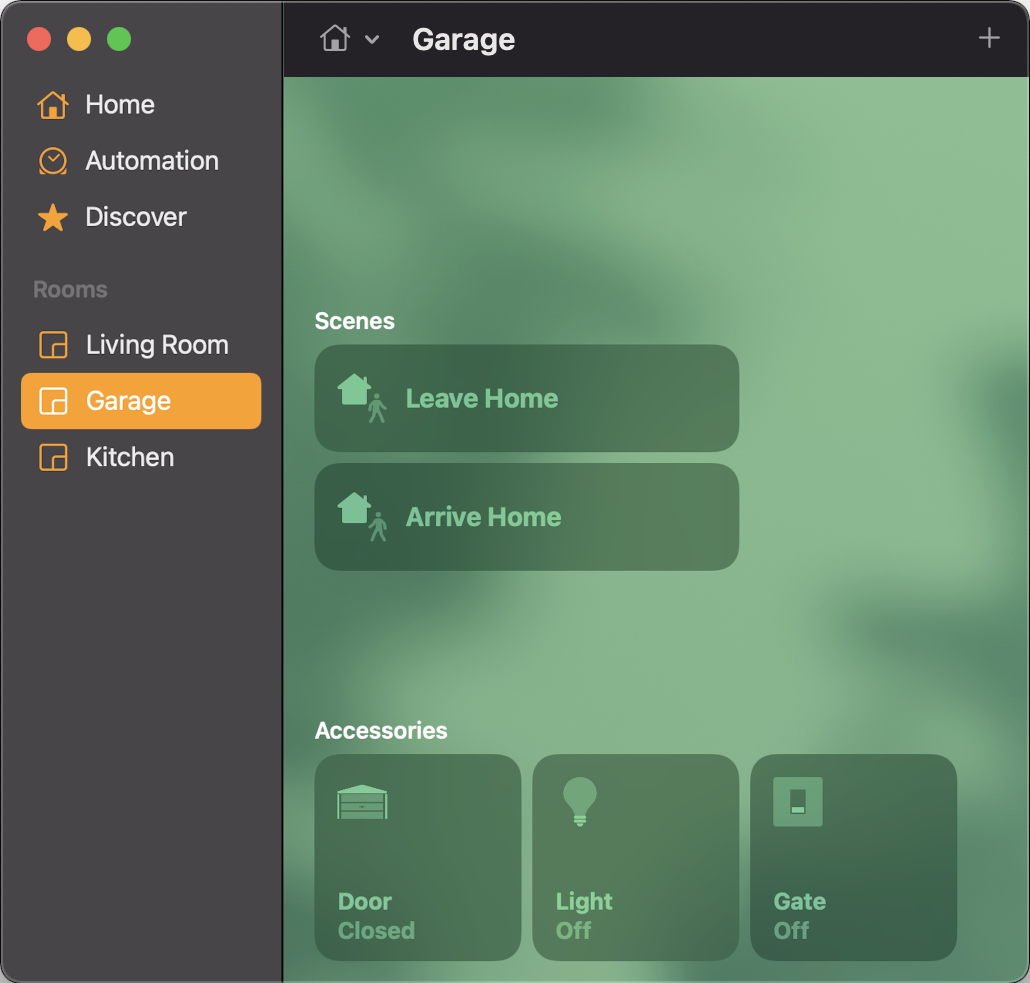
I now have my garage door, lights, and the building's garage door in HomeKit.

My garage's 'Room' in the Home app
Last step was to setup a couple of scenes for when I'm arriving and leaving. The arrival scene opens both doors (and the lights turn on due to the trigger I mentioned earlier). And the leave scene closes my garage and opens the building's door (I activate while I'm in the car when I'm between both doors).
I do this all via Siri on my Apple Watch. So for example, when driving home I just flick my wrist to turn on the screen and say "Hey Siri, I'm arriving home." and everything opens 🎉. I've now done this so many times that I can time it so that I get to the door as soon as it's finished opening4.
The only thing I miss is doing this with someone in the car that can appreciate the magnificence of this setup. My wife's reaction was more like: "so all those evenings were just so you could not press a button on a remote you have right here!?"
I've purposely omitted many of the technical details but if you're trying to do something similar and have questions, feel free to ping me on Twitter.
Thanks for reading!
Footnotes
-
Most relays you'll find work with 5v while the Raspberry Pi uses 3.3v on its pins. But this relay is supposed to work within the range of 3.3v to 5v. ↩
-
I never did get the trend of smart light bulbs… Who the hell prefers to use an app instead of existing physical button? ↩
-
Not going to happen… ↩
-
My neighbours probably think I'm now using a remote with a huge range! They'll see the door starting to open but I'm nowhere in sight 😝 ↩