Xcode: Comparing Build Settings
I've been using Xcode since about 2004, I believe I started on version 1.5. It's easily the IDE I've worked with the most… and probably the app I've spent more time on.
Other IDE's I've used include Eclipse, IDEA and more recently Visual Studio Code. All of them have their pros & cons but, understandably, Xcode is still where I'm most confortable.
Based on my experience, I think Xcode gets some undeserved bad rep… Thus, I'm starting an "Xcode Tips" series to share some of the not so obvious features I've picked up along the way.
Lets get started!
For a long time, whenever I needed to compare build settings between different targets I would simply open one target's settings in the main editor and the other's in the assistant editor.
Comparing build settings using the assitant editor can be confusing
Although this works, it has few drawbacks. For example, you have to keep both scrollbars in sync to easily compare settings; and the setting names are shown in both editors wasting a lot of screen space.
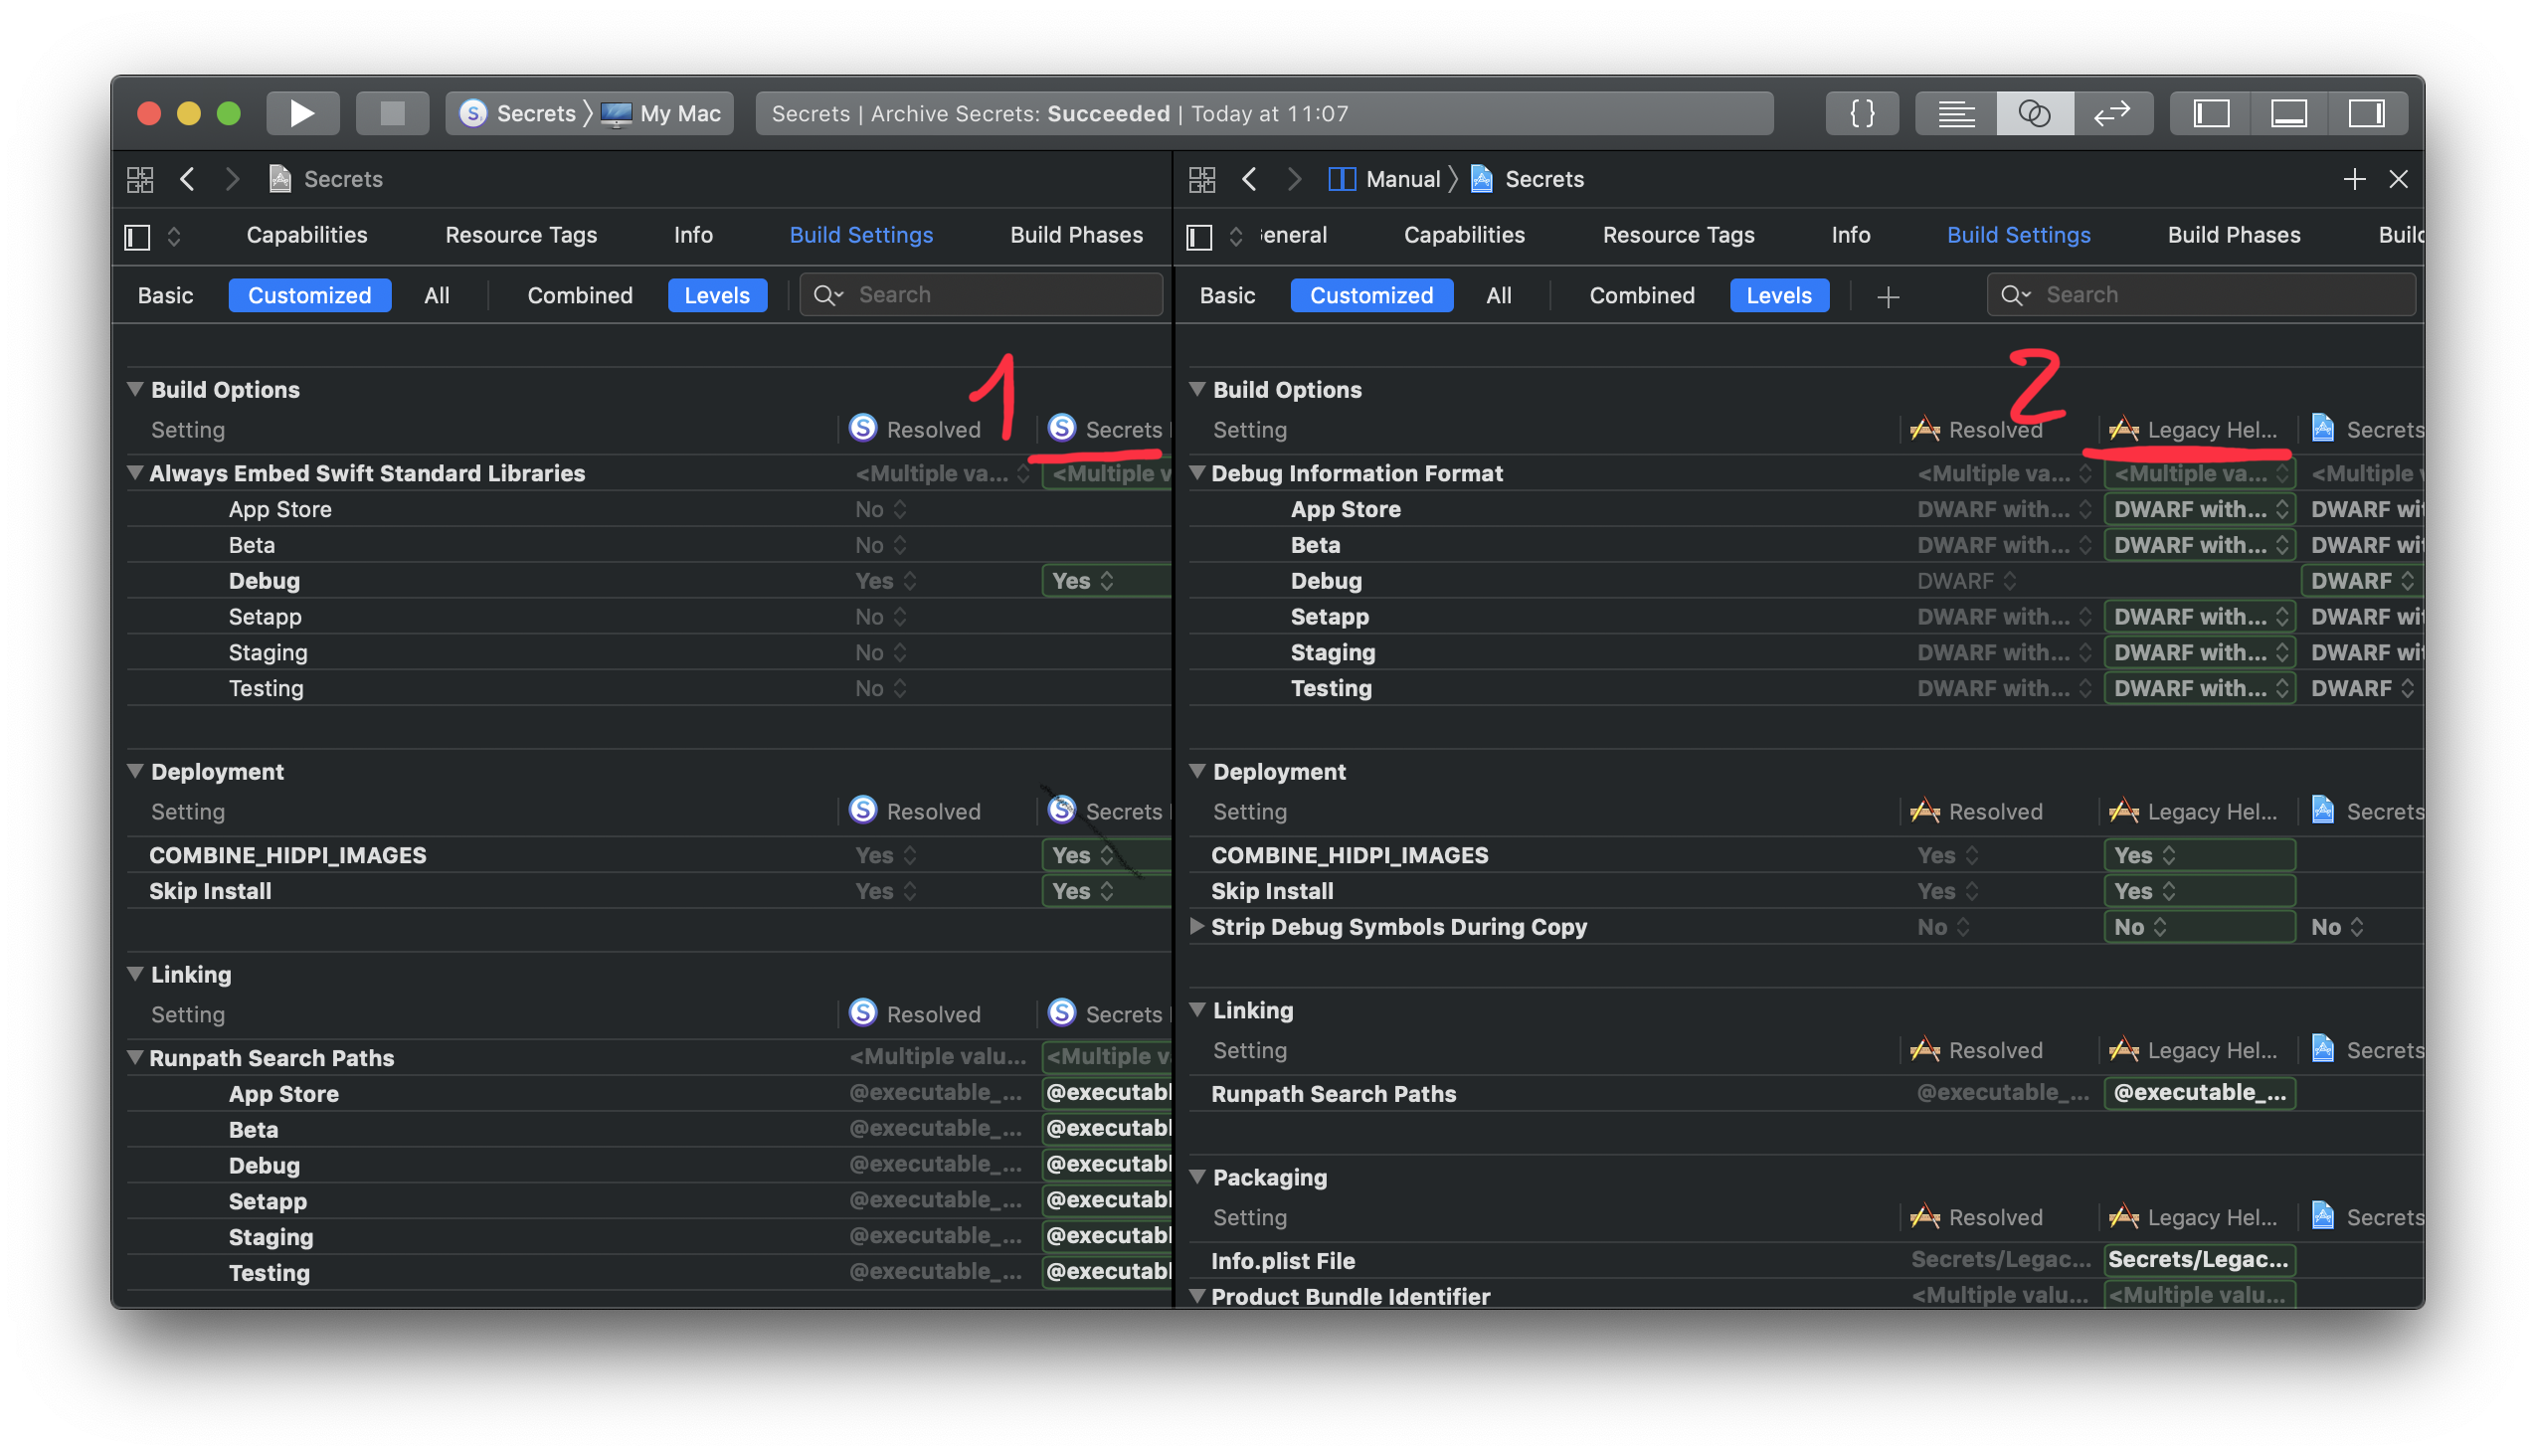
Luckily, Xcode provides a much better solution. Simply shift+click the targets you want to compare and then enable the "Levels" toggle on the top filter bar.

Comparing build settings within the same editor
By doing so, Xcode displays each target's settings side by side for easy comparison. Furthermore, you can/should also enable the "Customized" toggle make it even easier to spot differences.
Not only does this Xcode feature have none of the drawbacks mentioned before, it also allows you to compare more than 2 targets! Simply shift+click another target and another column is displayed! 🤗
Keep an eye out for future tips & tricks here.